When you take a photo with your iPhone, the last thing that you probably think about is the format (file type) of the image you are capturing. Generally speaking, that is a good thing as you should be focused more on composition, lighting, etc. However, if you are starting to think of yourself as a serious mobile photographer, it is worth taking a few moments to consider the file format that you are using to store your photos.
The cameras in iPhones and other mobile phones have come a long way in a short time. The new iPhone 5S features an 8 megapixel (MP) camera, which by most photographic standards is more than enough for making prints up to 11×17 inches and even larger in some cases. As a comparison, many high-end DSLRs still only feature a 10-12 MP sensor. Granted, the size of each pixel also plays a big part in the quality of the image, and the sensor of a DSLR is certainly much larger than that of an iPhone, but the latest iPhones are more than capable of capturing and creating professional quality photos right out of the box.
So why this discussion about file types then? The reason is simple. Depending on your needs and goals with regard to your photography, there are some decisions regarding file format that you should consider. It is not my goal to convince you that one file type is better than the other (although I certainly have my preferences). The choice is ultimately yours to make as both formats yield excellent photos.
JPGs (or JPEGs)
The native iPhone camera (and many other camera apps) saves photos in a compressed JPG format. JPG stands for “Joint Photographic Experts Group” and is the standard format for mobile cameras as well as most point-and-shoot cameras.
What do we mean by “compressed”? Compression is used to reduce the file size of a photo while retaining as much detail as possible. In most cases, any loss of detail is minor and only noticeable to the naked eye when viewing a very large enlargement. For most purposes, this file type works great for mobile cameras as it takes up little space and is easily transferable via the internet due to its relatively small file size.
However, the limitations of the JPG format become more noticeable if you put your photos through multiple editing stages on your iPhone. The reason for this is that JPGs are very susceptible to what is known as “generation loss”. Every time you open and image in an app, make changes, and re-save the photo, there are minute losses of detail/quality that occur, and each save is considered a “generation” of the photo. Another thing to consider is whether or not you will want to make large prints from any of your photos as JPGs will also show their limitations in this area as well.
TIFFs
Another file format that has long been a popular standard for photos by professional printers is TIFF (Tagged Image File Format). Like JPGs, TIFFs can also be compressed, but more often, they are saved as uncompressed, or lossless files. This results in a higher-quality image that is less susceptible to generation loss and can be used to make even better prints than a JPG image.
TIFF vs. JPG
So if TIFF files are so great, why aren’t they the standard?
The main reason is the sheer size of the image files. If you take two photos of the same image (one as a TIFF and one as a JPG), the TIFF will be many times times larger on average (e.g., a 2 MP JPG roughly equals a 30 MP TIFF).
Clearly, this would be a disadvantage for many iPhone users who cherish every little bit of storage space they have. However, for those of us that treat our iPhone as a camera first and a phone/everything else second (admit it, I know many of you share this same attitude), the option of working with larger file types is a viable option to consider.
Let us consider the following images of guitar picks for comparison. It should be noted that even though I took one in TIFF mode, it had to be converted to a JPG when creating the comparative grid so that it could be posted on the web as most browsers don’t support TIFFs. Therefore, some loss of detail has likely occurred, but the differences are still apparent (click on the image to enlarge).
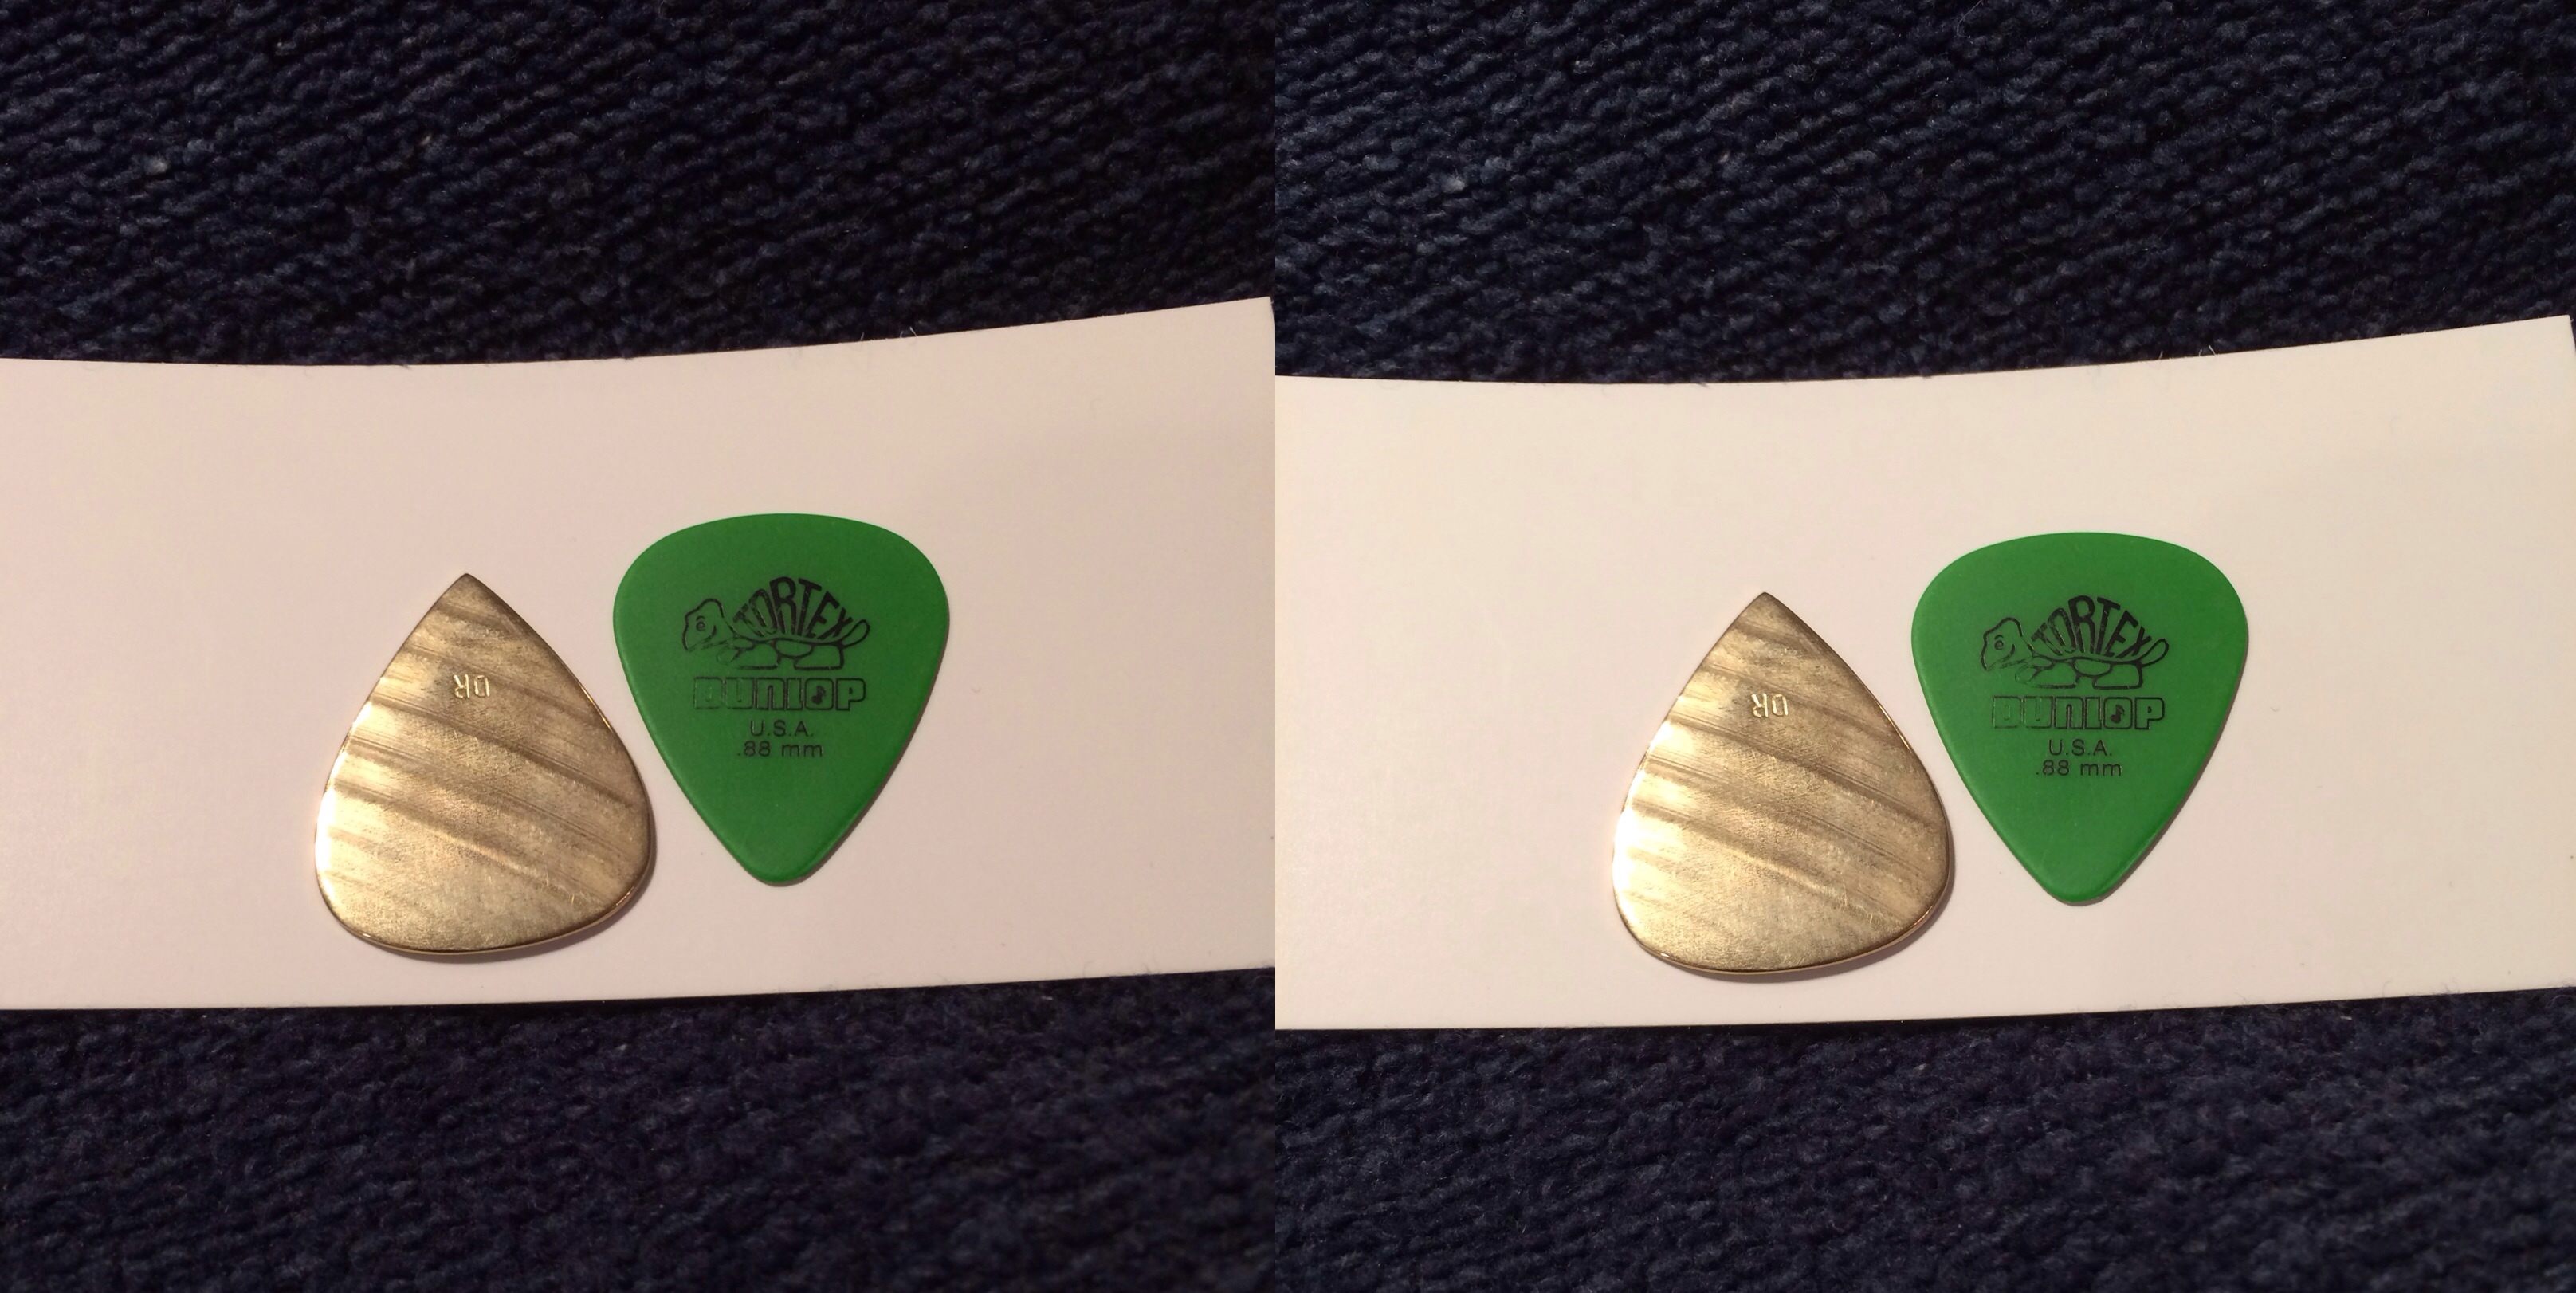
JPG (Left) vs. TIFF (Right)
The first photo (on the left) was taken with the native camera of my iPhone 5s in standard JPG mode (the only option). The second image (on the right) was taken with PureShot in TIFF mode. For comparison sake, the JPG is 1.68 MB and the TIFF is 23.97 MB.
These photos are certainly not meant to be artistic in any way. They are simply for illustrative purposes. Let’s look at the two images more closely in the following comparison (click on the image to enlarge).
As you can see, the differences in quality/resolution at this level are very subtle, but they are there if you look closely. The TIFF on the right is noticeable smoother, especially in the green areas. If you look closely at the edges of the letters, you will also notice slightly more bitmapping in the left (JPG) image.
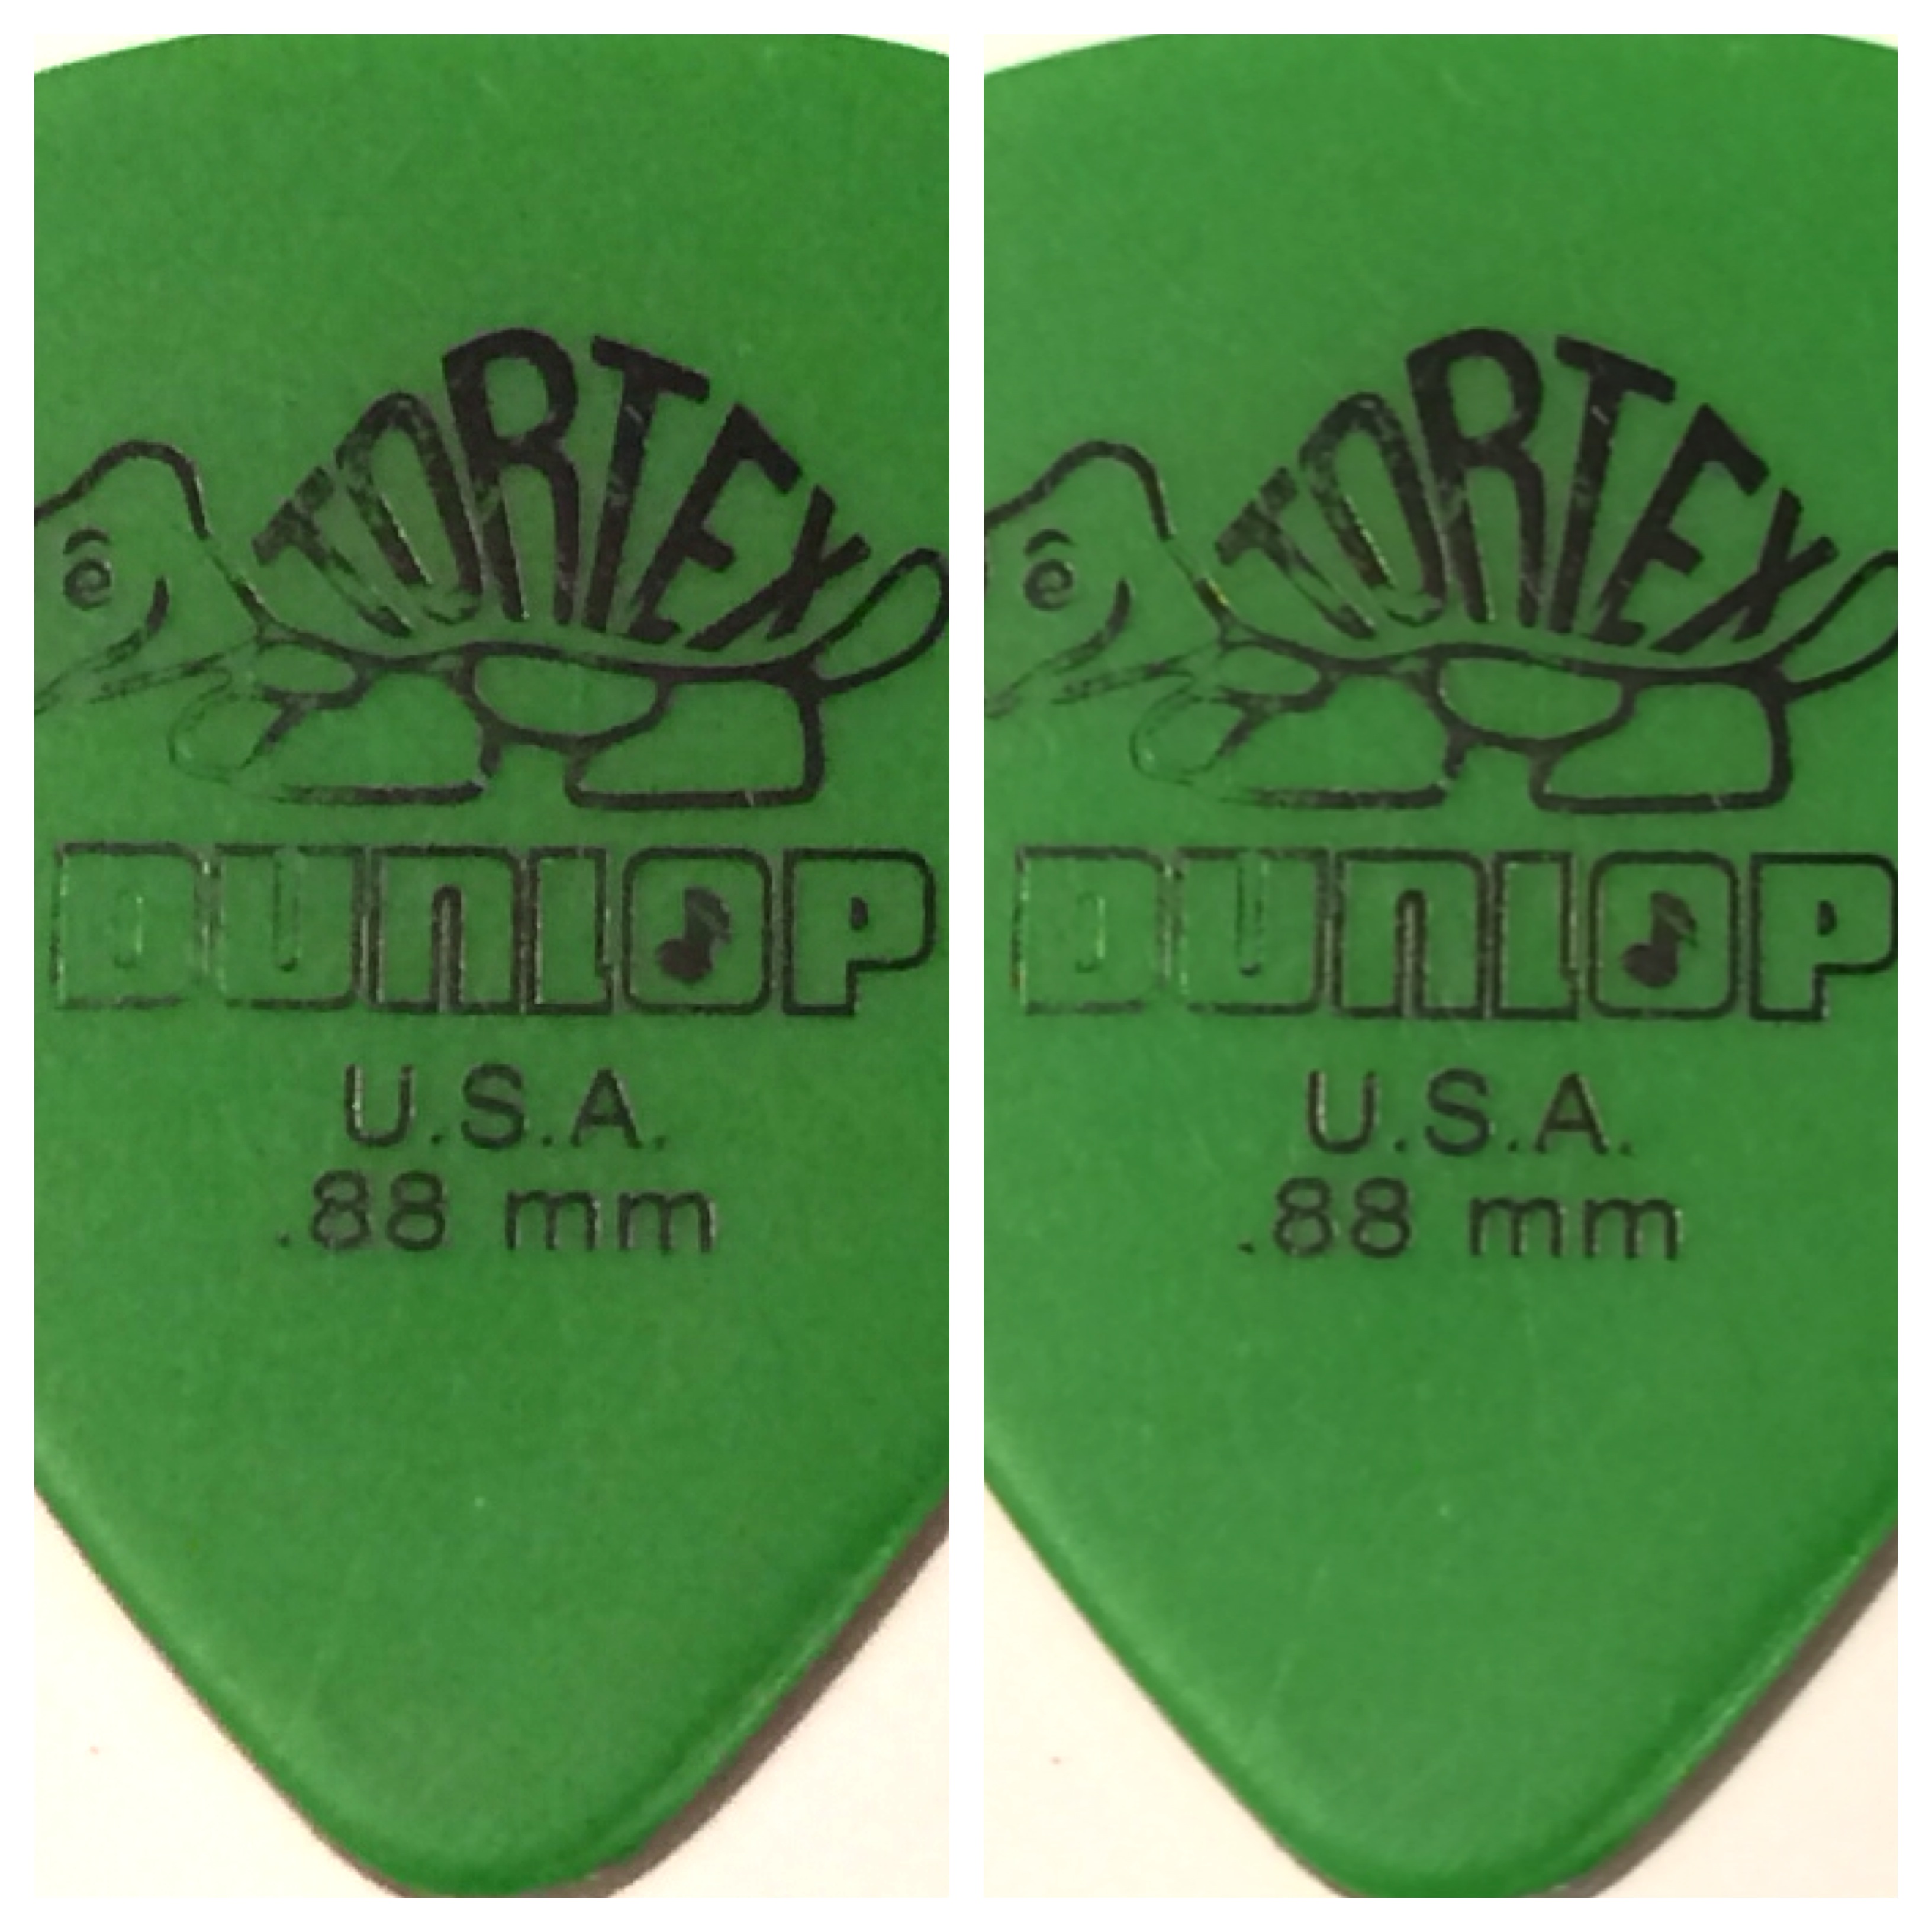
Now let’s look at these even closer by zooming into just one letter of writing on each guitar pick (the “X” in “TORTEX”).
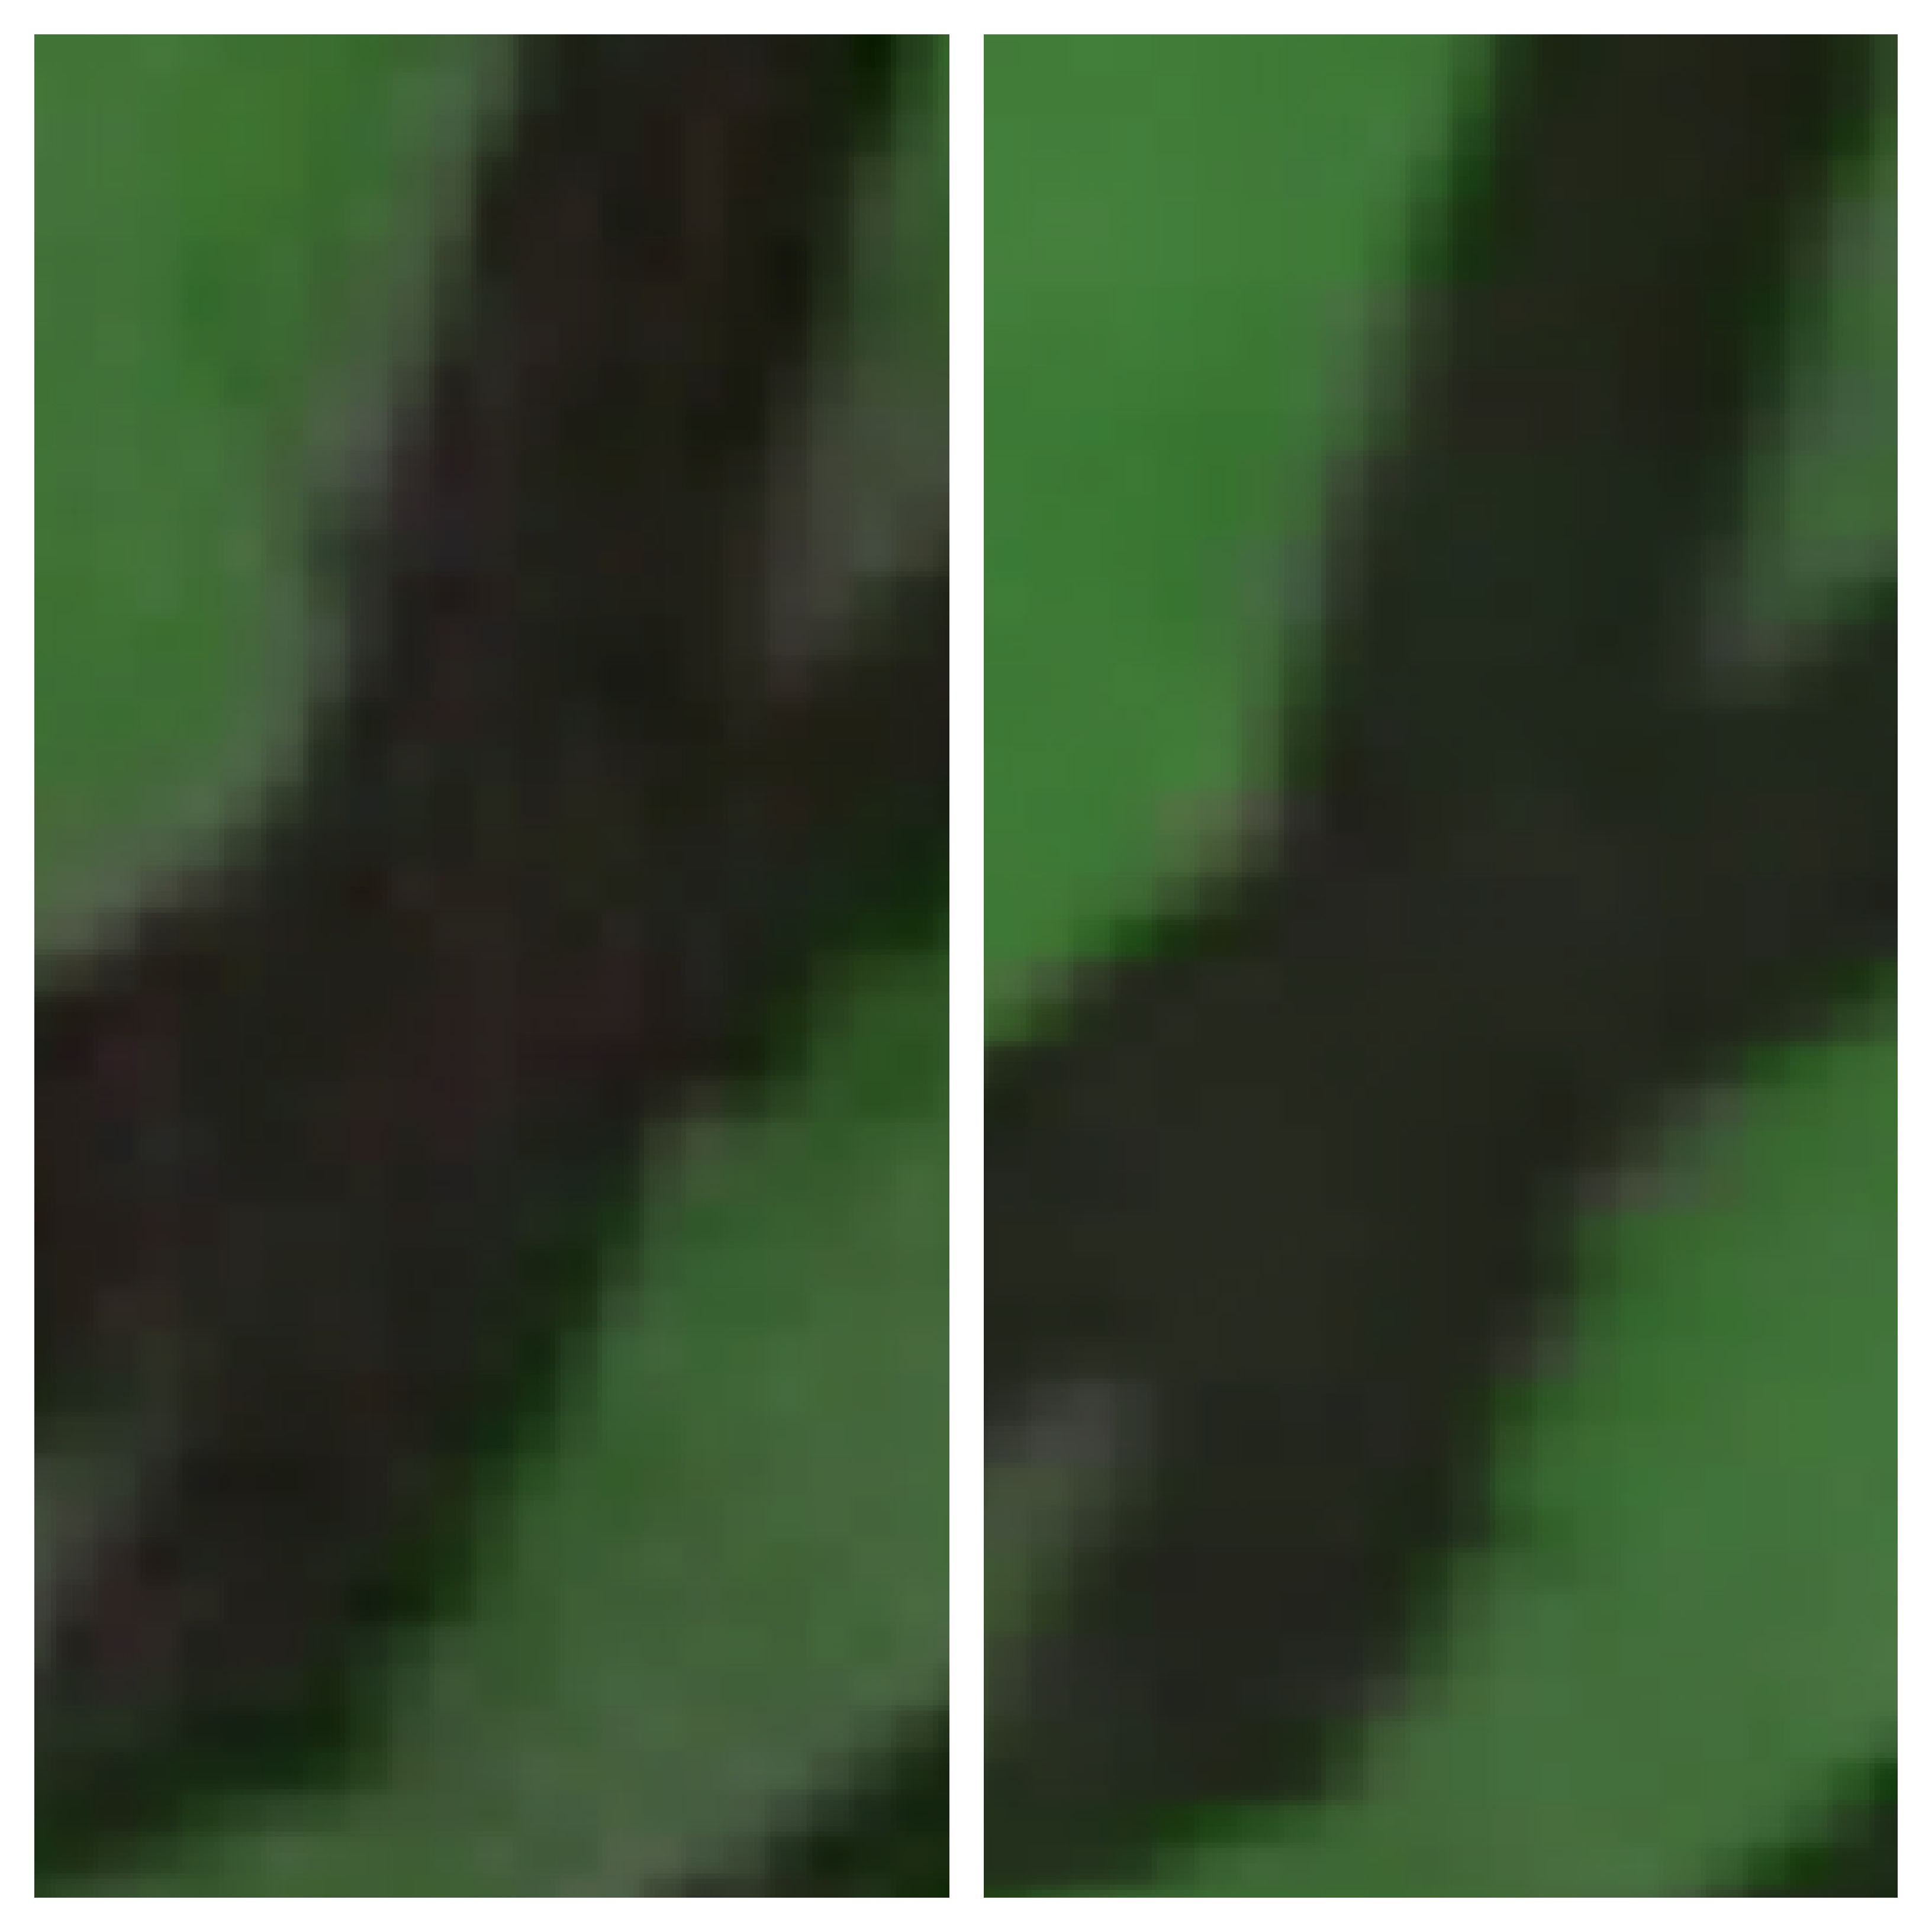
Again, the differences aren’t that dramatic, but they are clearly noticeable (and again, please keep in mind that the TIFF was downscaled to a JPG in order to be posted here). The TIFF on the right is once again noticeably smoother.
The Verdict
Considering the extreme level of zoom that we are looking at, is the difference all that big of a deal? To the naked eye, probably not. Again, this all depends on what your goals are. For me, I have always had a bit of OCD when it comes to image quality/detail, so I always want to maximize the quality of every shot. I also make large prints of many of my photos, so having the highest possible resolution is very important to me, especially if I can print directly from TIFF files.
The higher resolution also makes a significant difference when editing photos as the better the image you start out with, the less generation loss you will experience. Even if you use editing apps that ultimately save as JPGs, you will likely end up with a better result by starting with an original photo in TIFF format.
If you choose to only work with JPGs, you will end up with excellent photos. There’s no question about it. The iPhone is capable of amazing quality using nothing more than the native camera. However, it you want to squeeze every bit of possible detail out of your images, then I fully recommend shooting (and editing) in TIFF format.
If you choose to take the latter route, there are some apps to consider in order to get started.
Camera Apps
First, you need to check out some of the camera replacement apps that utilize the TIFF format. Unfortunately, the native iPhone camera does not allow you to set your preference for file types, so you are restricted to JPGs if you opt to use it.
However, if you are reading this, you are probably already aware that there are a multitude of camera replacement apps out there that you can use. If you have checked out enough of them, you may have found that many of them allow you to change the format in which your photos are saved.
Most apps are still limited to the JPG format, but many do allow you to set the level of compression from high (smaller file, lower quality) to low (larger file, better quality).
The native iPhone camera tends to use a JPG setting that features a bit more compression than the “MAX JPG” settings of many other camera apps. This is obvious by simply comparing the file sizes of similar photos taken with the native camera and any number of camera apps that allow you to change the compression settings. For example, the above sample JPG photo that was 1.68 MB in size using the native iPhone camera would be roughly 5 MB in size using most camera apps that allow a low-compression, MAX JPG setting.
Unfortunately, if you want to use the TIFF format, your list of choices for camera apps is much more limited. The number of developers that are building apps that use the TIFF format is slowly growing, but they are still a small minority. Luckily though, the few that are available are high-quality camera apps that you may wish to consider.
In theory, it should be as easy as searching the App Store for “camera and TIFF”, but for some reason, the results list can vary from day to day, but this is a good place to start. You might also search on Google for “iOS camera and TIFF”.
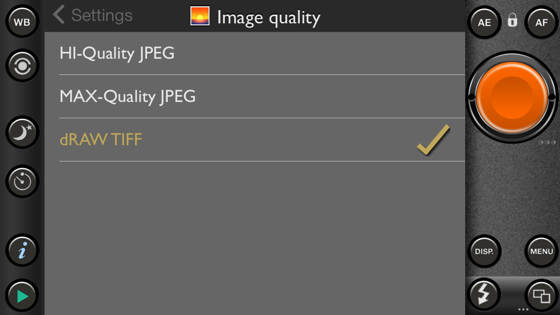
The one I use the most (and I have no connection to this developer whatsoever) is PureShot. This particular app allows you to set the image output to one of three different levels.
- HI_Quality JPEG
- MAX_Quality JPEG
- dRAW TIFF
PureShot File Format Settings
Option #1 is roughly equal to the standard output of the native iPhone camera. Option #2 generates a file about 2-3 times larger than the first option. The third, TIFF option, yields The highest quality images that are about 5-6 times larger than the second option.
The term “dRAW” refers to the fact that the TIFF images are similar to the RAW format of images that are generated by most DSLRs in that the image data is taken from the image sensor before any JPG processing/compression is applied. Because the image still undergoes minimal processing on the iPhone, it would be incorrect to label this as a true RAW image, so it is saved as an uncompressed TIFF instead. PureShot also offers the ability to apply lossless compression to the TIFF files, which is better than JPG compression, to help save on file size.
I suggest trying out as many camera apps as you can afford to (both time and money) and find whatever works best for you. There is no such thing as a one-size-fits-all camera app. For example, you will find that the developer behind PureShot has a number of camera apps available on the App Store, and while all of them offer the ability to save photos as TIFFs, they all offer very different features for capturing photos.
In addition, other fantastic apps such as ProCam (not to be confused with ProCamera 7, which is also an excellent app), GCam, and Hueless offer the ability to save photos in lossless TIFF format, and each offer their own unique approach.
Ultimately, you may find that the camera that best suits your shooting style only saves in high quality JPG format. If that is the case, then go for it! The best camera app is the one that feels most intuitive to you and “gets out of your way” so that you can capture your photos as effortlessly as possible. You will still end up with high-quality photos.
Photo Editing Apps
Once you’ve settled on a camera app or two, the next thing to consider is if you want to use editing apps that allow you to save your work as TIFFs or at least low compression JPGs in order to preserve as much detail as possible.
Just as the list of camera apps that support TIFF files is somewhat limited, so is the list of editing apps (if not more so). Now, if you aren’t a mobile photography purist, you could always transfer your photos from iPhone to PC, and then open your TIFF tiles on using software such as iPhoto, Lightroom, Photoshop, etc. However, since we are trying to remain true to the spirit of mobile photography here, let’s assume that’s not an option. 😉
Before we get to apps that support TIFFs, it should once again be noted that taking an original TIFF image and editing it in an app such as Snapseed is still an excellent choice. The Snapseed photo editor accepts TIFF images for editing, but will convert and save them as compressed JPG files. However, since you are starting with an uncompressed image, you will have more detail to work with in the editing process and will arguably still obtain a better result than if you had started with a compressed JPG. Now the differences may be slight, but if you are concerned with quality, then every little bit counts.
As far as apps that will support editing and saving in TIFF format, the best one that I have come across is Filterstorm. This is an app that I am very fond of due to its high level of control over the editing process. It is almost like a mobile version of full-fledged editing software such as Lightroom. But a proper discussion of Filterstorm is a topic for another day…
For now, we only need to concern ourselves with the fact that this app is one of only a few that allow for the saving of edited photos as TIFFs. In fact, Filterstorm allows for the saving of JPGs at a variety of compression levels (via a value slider), TIFFs, and even PNG files (I have opted not to discuss PNGs here as while it is also a high quality format, it is generally considered to be better suited for graphics files and not photos.
Conclusion
It should be obvious that my personal bias is towards shooting and editing in TIFF format as it does preserve the highest level of detail for one’s photos. However, I want to be completely honest and re-state that you are in great shape no matter which format you choose.
To be honest, I sometimes prefer the slightly lower resolution of JPGs as the extra noise reminds me of the grain of medium speed (ISO 400) black and white film I used to shoot back in my film days. Sometimes digital photos can almost be a bit too sharp for me, but I’m showing my age as I have fond memories of shooting film back in the 1980s and 1990s.
I hope that I have given you some good food for thought when it comes to the format of your mobile photos. I welcome any and all comments, and should you have any detailed questions, please do not hesitate to contact me via my website (link below).
Now stop reading and go take some photos!
About The Author
A long-time photographer with a particular love of black and white imagery, Rob DePaolo is passionate about the “new” medium of mobile photography and is always on the lookout for new tools and techniques for the creation of great photos. Rob loves sharing his ideas and experiences in order to help others go from taking simple “snapshots” with their mobile phones to creating serious art.
